_______________________________________________
July 23, 2008
|
Most of the house still had the original galvanized steel plumbing which was pretty much near the end of its life at 64 years old. Some of it had been replaced with copper, most likely during the late 60's remodel. We knew we were going to have to replace the galvanized pipe, but decided it would be easiest to just replace everything.
We used PEX (crosslinked polyethylene) tubing for the water supply lines, and ABS plastic for the drain lines. PEX is cheap and really easy to work with compared to copper, so the water supply lines went in pretty smoothly. The drain lines were a little more difficult since they are not flexible, and there is a lot more to learn about what can and can't be done according the plumbing code. Luckily our local plumbing inspector was very helpful. Our biggest issue was getting drain lines run for the upstairs bathroom which has not been remodeled yet. So we had to run the drain lines to a location that will be accessible when we remodel that bathroom, and cap them off. |
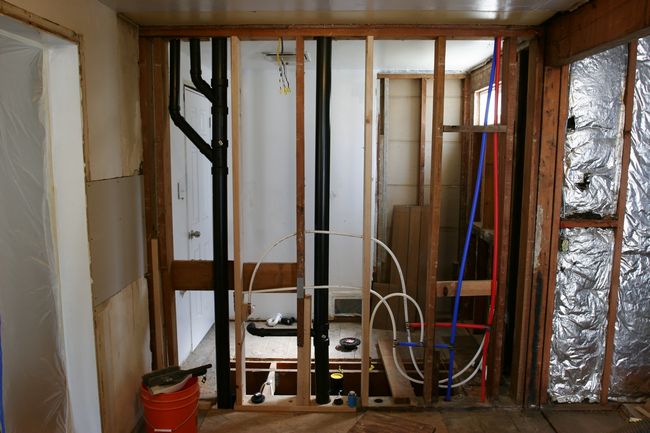
This is the wall between the bathroom and kitchen that has the majority of the plumbing in the house. The black ABS pipe on the left is for the upstairs bathroom, the one to the right of that is the drain for the downstairs bathroom, and the main vent. The red and blue PEX lines are the hot and cold main water supplies, and the white ones feed the indivudual fixtures from the main lines.
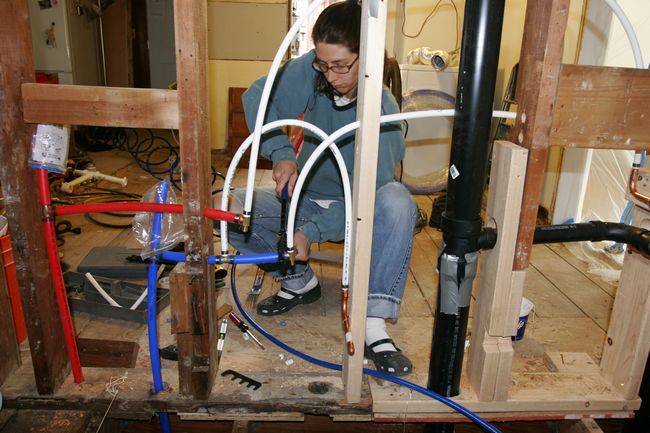
The PEX water lines are attached to barbed fittings with crimp rings and then checked with a go/no-go guage to make sure the connection is good. Its real easy to do, but sometimes requires careful planning of your order of operations in tight spaces to make sure you can get the large crimpers in position.
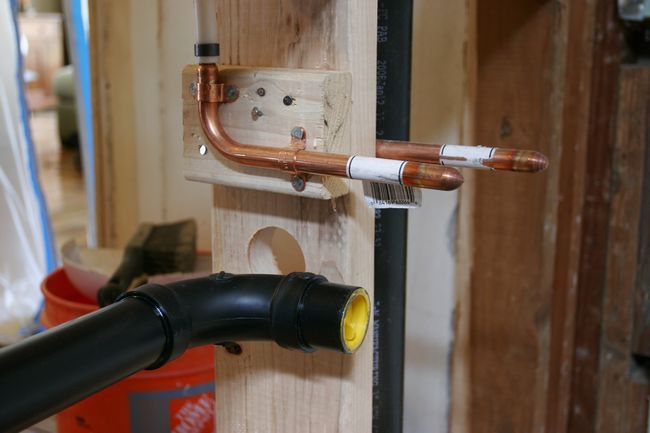
Where the water lines come out of the wall, they have to be solidly attached or you will fail inspection so we used these copper stub-outs which crimp onto the PEX, then get anchored to the studs. The ends are closed so the system can be checked for leaks during the rough-in inspection. As you can see, the drain line is also capped off (the yellow test cap) so it can be checked for leaks during the inspection.
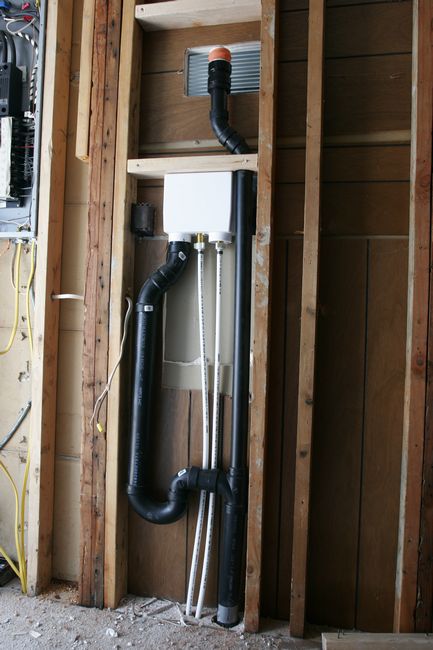
This is the wall between the utility room (which has our washer and
dryer) and the family room. The wall had wood paneling on it which
we are going to remove anyway, so it gave easy access for new
plumbing to the washing machine. The orange thing you see at the
top of the ABS pipe is the vent for the waher. Rather than running
pipe up into the attic and over to the main vent, we used an Auxilary
Air Valve (AAV), but had to put a louvered panel in the wall to
allow air flow to it.
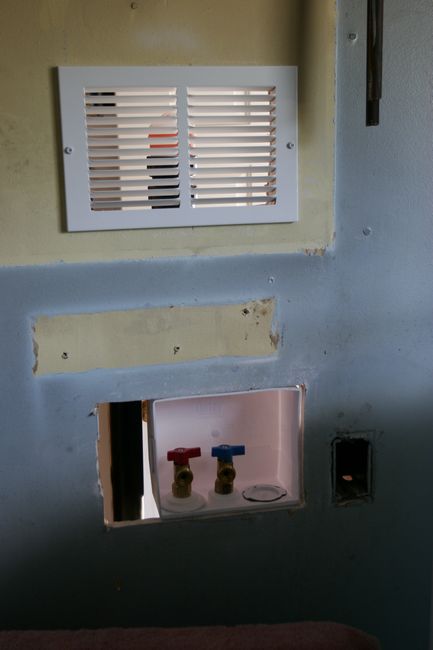
This is from the other side of the wall in the utility room. You can
see the AAV through the louvered vent. We need to patch the wall
around the box with the valves and drain line since the inpsector
made us move it over a little to accomodate a change in the drain line.
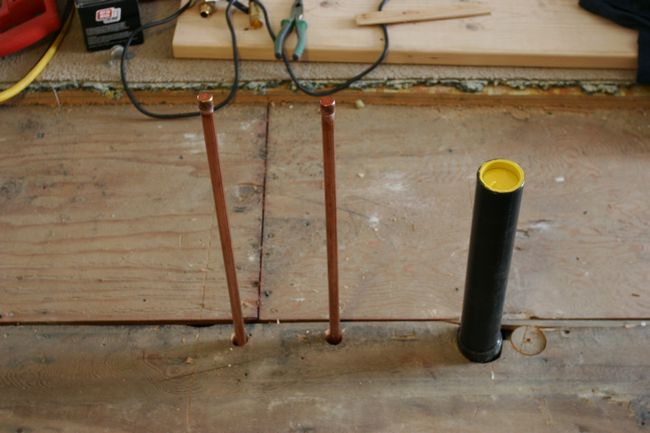
This is where the kitchen sink will be. The two copper pipes are the hot and cold water lines which are attached to PEX in the crawl space. After the cabinet is set in place, we'll remove the caps on the water lines and add shut-off valves, and remove the test cap on the drain and add the trap and an AAV to vent the line.
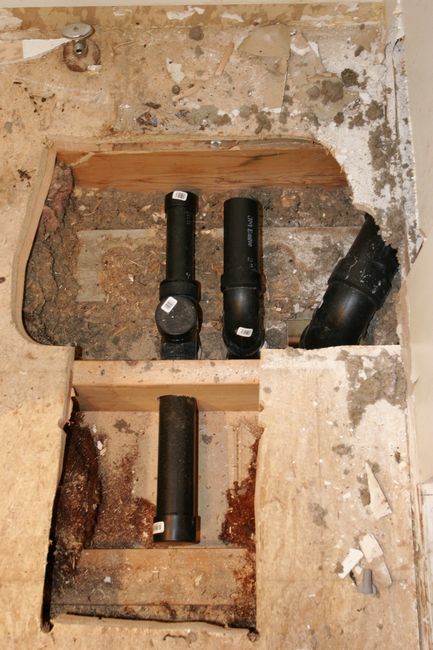
This is the floor of the upstairs bathroom. Since we are going to
enlarge the bathroom and add a tub/shower, we have to move the
location of the sink and toilet. But since we're not doing that
work now, just focusing on getting our kitchen and other bathroom
back in order, we ran the drain lines up through the wall and to a
location where we can get to them later.
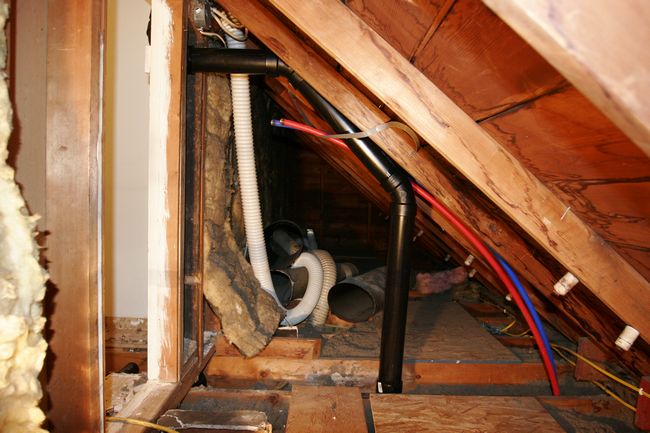
This is the vent coming up from downstairs into the attic and going into the old bathroom, where it turns up and goes out the roof. You can also see the water supply lines which we will use for the upstairs bathroom.
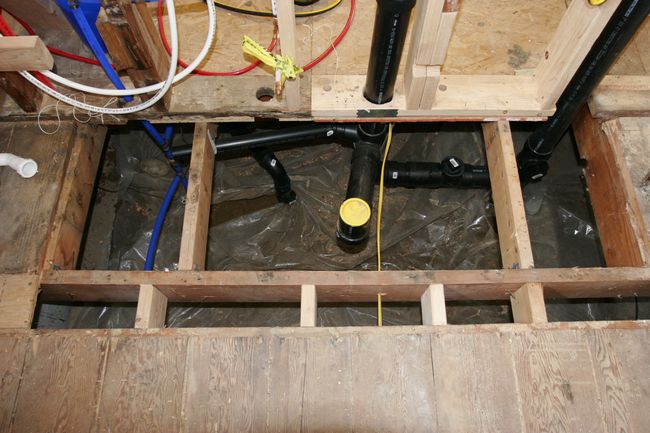
We had part of the bathroom floor open since the old subfloor had a little water damage, and because it made it a lot easier to access the drain lines under the house.
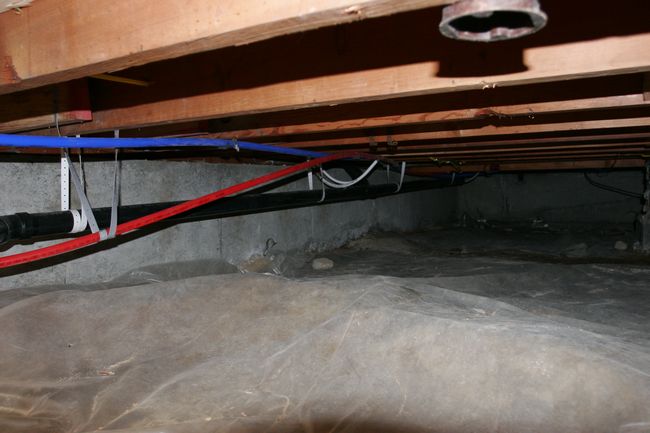
Water supply and drain lines in the crawl space.
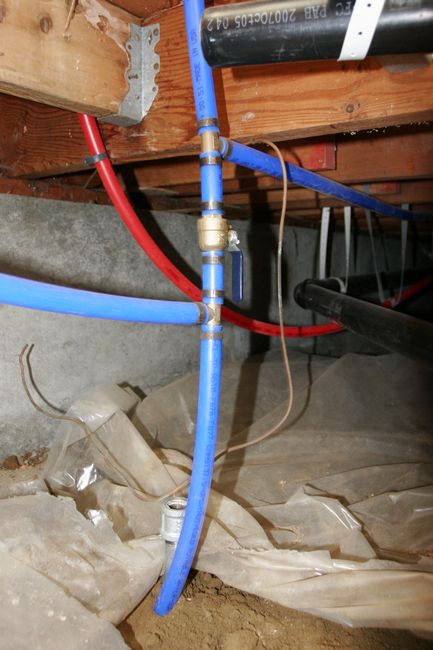
Another shot in the crawl space. We also replaced the water service
line from the water meter to the house. You can see the new line
coming up out of the dirt.